

How is terrazzo tile made?
Sep 04, 2025
Terrazzo tiles have been a popular choice for flooring and wall applications for centuries, thanks to their durability, aesthetic appeal, and versatility. As a leading terrazzo tile supplier, I am often asked about the manufacturing process behind these beautiful tiles. In this blog post, I will take you through the step-by-step process of how terrazzo tiles are made.
Step 1: Material Selection
The first step in making terrazzo tiles is to select the right materials. Terrazzo tiles are typically made from a combination of marble chips, quartz, glass, or other aggregates, which are mixed with a binder such as cement or epoxy resin. The choice of aggregates and binder depends on the desired appearance, durability, and application of the tiles.
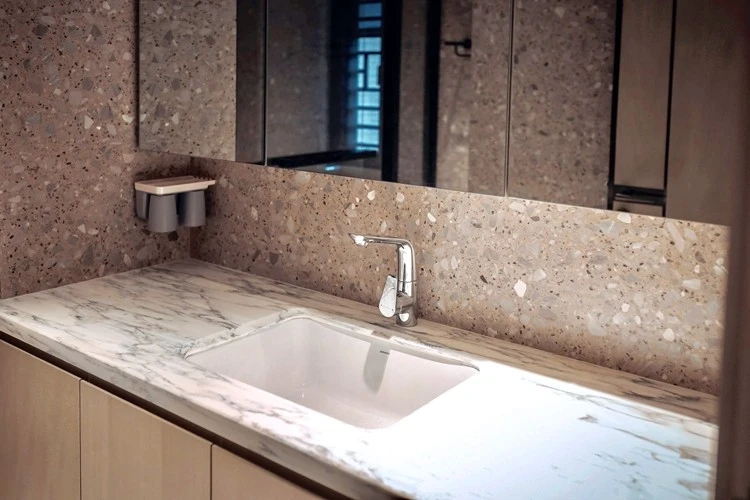

For a more traditional look, marble chips are a popular choice. Marble is a natural stone that comes in a variety of colors and patterns, which can be used to create unique and beautiful terrazzo designs. Quartz and glass aggregates are also commonly used, as they are more durable and resistant to stains and scratches than marble.
The binder is an important component of terrazzo tiles, as it holds the aggregates together and gives the tiles their strength and durability. Cement is the most commonly used binder for terrazzo tiles, as it is inexpensive, readily available, and easy to work with. Epoxy resin is a more expensive but more durable option, as it is resistant to water, chemicals, and stains.
Step 2: Mixing the Aggregates and Binder
Once the materials have been selected, the next step is to mix the aggregates and binder together. This is typically done in a large mixer, where the aggregates and binder are combined in the desired proportions. The mixture is then thoroughly mixed to ensure that the aggregates are evenly distributed throughout the binder.
The ratio of aggregates to binder depends on the type of aggregates and binder being used, as well as the desired appearance and durability of the tiles. In general, a higher ratio of aggregates to binder will result in a more porous and less durable tile, while a lower ratio will result in a more solid and durable tile.
Step 3: Pouring the Mixture into Molds
After the aggregates and binder have been mixed together, the next step is to pour the mixture into molds. The molds are typically made of plastic or metal and are designed to create the desired shape and size of the tiles. The mixture is poured into the molds and then leveled off to ensure that the surface of the tiles is smooth and even.
The molds are then placed in a curing chamber, where they are allowed to dry and harden for a period of time. The curing time depends on the type of binder being used, as well as the temperature and humidity of the curing chamber. In general, cement-based terrazzo tiles take longer to cure than epoxy resin-based tiles.
Step 4: Grinding and Polishing the Tiles
Once the tiles have cured, the next step is to grind and polish them to a smooth and shiny finish. This is typically done using a series of grinding and polishing machines, which gradually remove the surface layer of the tiles and expose the aggregates. The grinding and polishing process can take several hours or even days, depending on the size and complexity of the tiles.
The final step in the grinding and polishing process is to apply a sealant to the tiles to protect them from stains and scratches. The sealant is typically a clear, water-based coating that is applied to the surface of the tiles using a brush or roller. The sealant is then allowed to dry and cure for a period of time before the tiles are ready to be installed.
Step 5: Quality Control and Packaging
After the tiles have been ground, polished, and sealed, the next step is to perform a quality control check to ensure that they meet the required standards. This typically involves inspecting the tiles for defects such as cracks, chips, or uneven surfaces. Any tiles that do not meet the required standards are rejected and discarded.
Once the tiles have passed the quality control check, they are ready to be packaged and shipped to the customer. The tiles are typically packaged in boxes or crates, which are designed to protect them from damage during shipping. The boxes or crates are then labeled with the product name, size, color, and other relevant information.
Step 6: Installation
The final step in the process is to install the terrazzo tiles. Terrazzo tiles can be installed in a variety of applications, including floors, walls, countertops, and backsplashes. The installation process typically involves preparing the surface where the tiles will be installed, applying a layer of adhesive to the surface, and then laying the tiles in place.
The tiles are then grouted to fill in the gaps between them and to give the installation a finished look. The grout is typically a mixture of cement, sand, and water, which is applied to the gaps using a grout float. The grout is then allowed to dry and cure for a period of time before the surface is cleaned and sealed.
Conclusion
In conclusion, terrazzo tiles are a beautiful and durable flooring and wall option that can add a touch of elegance and sophistication to any space. The manufacturing process behind terrazzo tiles is complex and involves several steps, including material selection, mixing the aggregates and binder, pouring the mixture into molds, grinding and polishing the tiles, and quality control and packaging.
As a leading terrazzo tile supplier, we are committed to providing our customers with high-quality terrazzo tiles that are made using the latest manufacturing techniques and materials. If you are interested in purchasing terrazzo tiles for your next project, please visit our website at Terrazzo Tiles Bathroom Floor, Terrazzo Kitchen Wall Tiles, or Terrazzo Tile Bathrooms to view our selection of products. We would be happy to answer any questions you may have and to help you choose the right terrazzo tiles for your needs.
References
- "Terrazzo: A Comprehensive Guide to Design, Installation, and Maintenance." By John W. Lyons.
- "The Terrazzo Book: A Practical Guide to Design, Installation, and Maintenance." By Robert E. Pettit.
- "Terrazzo Tiles: A Durable and Beautiful Flooring Option." By HomeAdvisor.