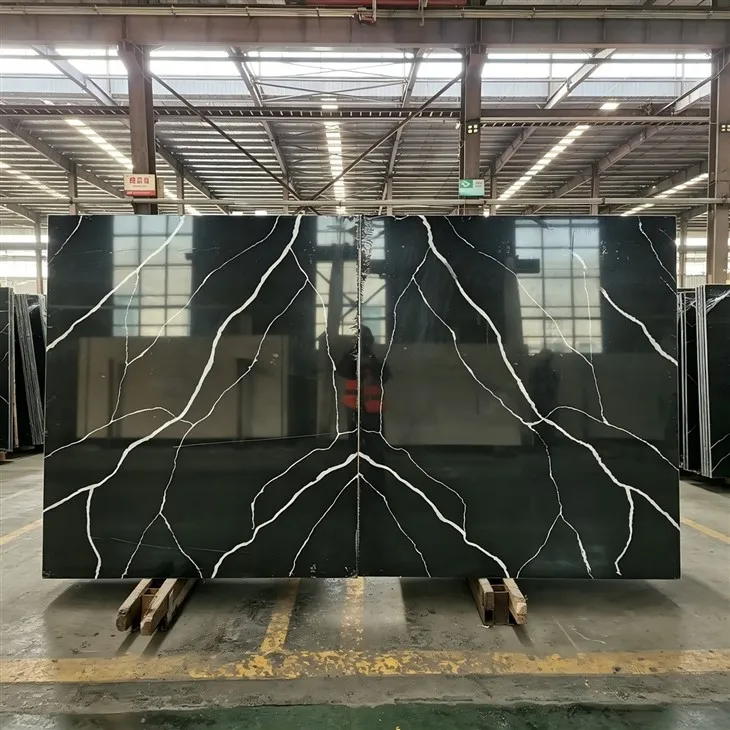

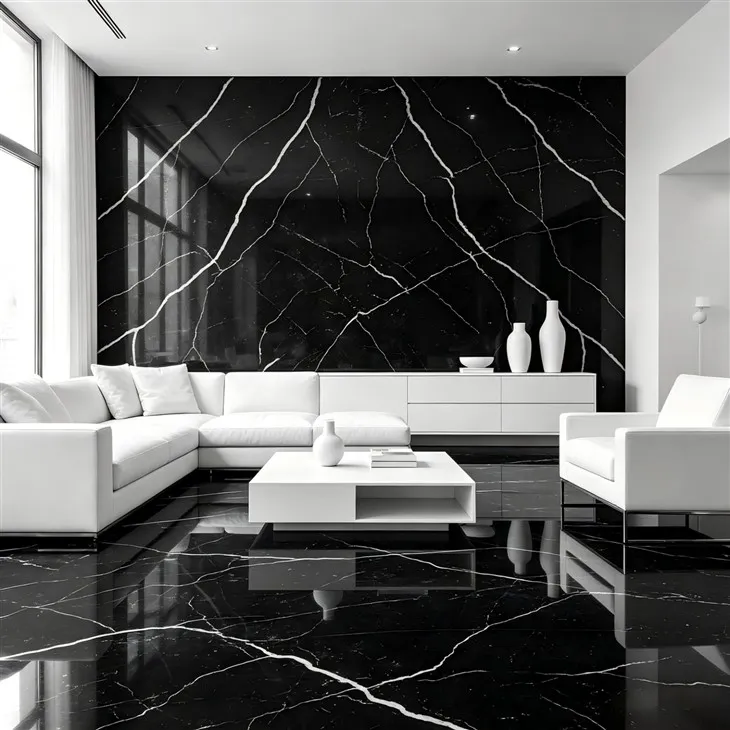
Nero Marquina Wall Tiles
1. Material: Quartz
2. Finishing: Polish surface, Honed surface
3. Color: Nero Marquina
4. Packing: Wooden bundle, Pallet
5. Lead Time: 7 days -14 days
6. Customized Pattern available, on Stock.
7. MOQ: 100 SETS
- Fast Delievery
- Quality Assurance
- 24/7 Customer Service
Product Introduction
DESCRIPTIONS
Nero Marquina Wall tiles refers to floor tiles made from engineered quartz-a man-made material composed of roughly 90–95% natural quartz crystals mixed with resin, pigments, and other additives. These tiles are quartz slabs produced according to standardized sizes. They have the characteristics of uniform size, stable performance, and strong adaptability. White Quartz flooring can withstand short-term high temperatures of 300℃ (such as placing a hot pot directly), and will not burn or release toxic gases like wooden slabs. Therefore, they are widely used in kitchen, bathroom, wall decorations, furniture panels, etc.
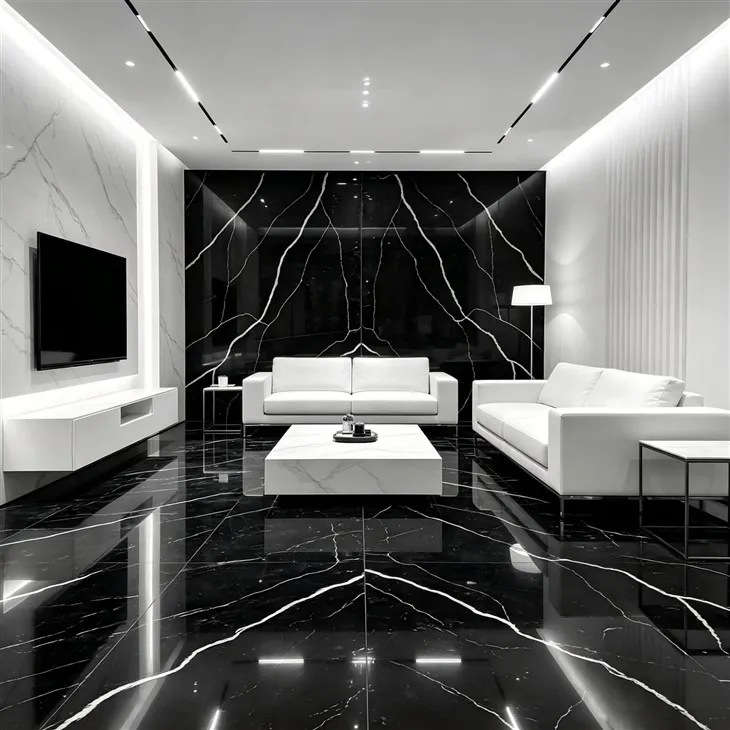
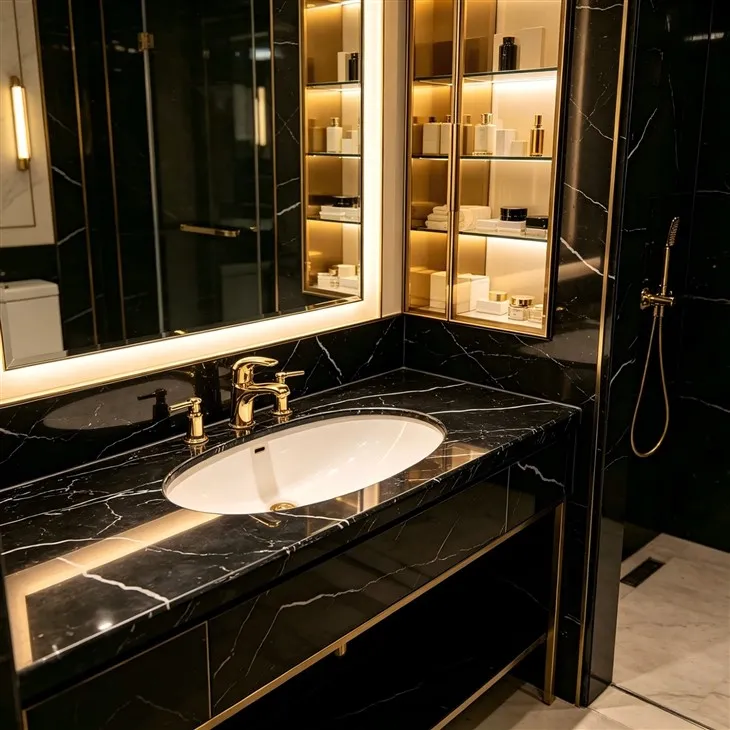
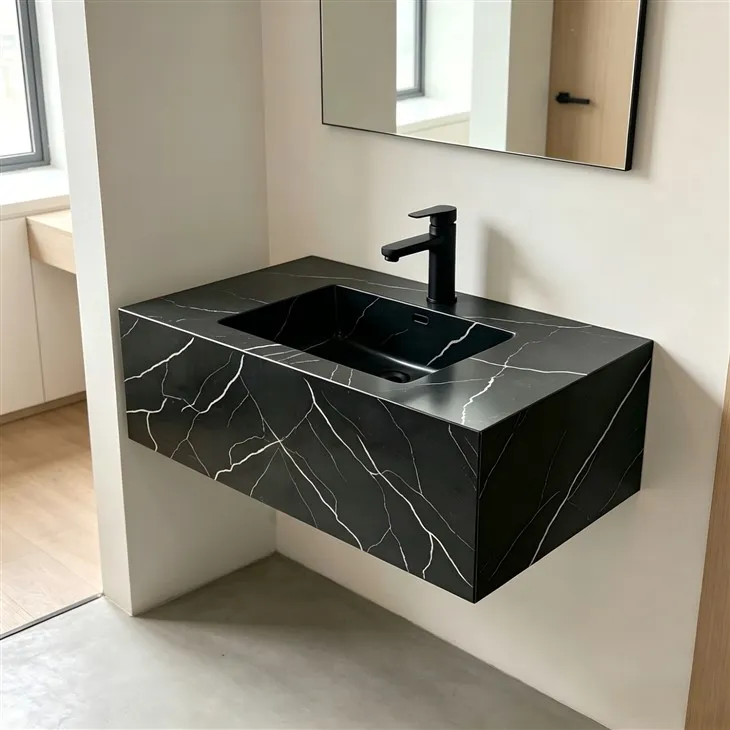
INSTALLATION AND UNIQUE SPACE

Product Features
- Elegant Appearance: The white color gives a clean, modern, and luxurious look, often used to brighten up spaces and create a sense of openness.
- Durability: Quartz is one of the hardest minerals, making the tiles highly resistant to scratches, cracks, and everyday wear.
- Non-Porous Surface: Unlike natural stone, quartz tiles do not absorb moisture, making them resistant to staining and bacteria-ideal for kitchens, bathrooms, and commercial areas.
- Low Maintenance: These tiles are easy to clean with just water and mild detergent, and they don't require sealing like marble or granite.
- Consistency in Color and Pattern: Being engineered, white quartz tiles offer uniformity across all tiles, providing a cohesive and predictable finish.
Installation Steps
Step 1 Base Surface Preparation
Thoroughly clear the floor of dirt and rubble, and confirm the surface is dry and perfectly flat. Fix all cracks and uneven spots to build a solid, uniform foundation.
Step 2 Layout Design & Marking
Take accurate measurements of the space, then find and mark the room's center with a pencil or chalk line. Dry-fit the tiles in advance to finalize the layout, and try to keep edge cuts to a minimum.
Step 3 Spread Bonding Mortar
Follow the product directions to blend thin-set mortar properly. Use a notched trowel to apply the mixture across limited floor sections at a time, so the adhesive does not dry out prematurely.
Step 4 Tile Installation
Firmly set each quartz tile onto the mortar with a slight twisting motion for full adhesion. Place tile spacers between pieces to keep uniform gaps for grout. Tap tiles lightly with a rubber mallet to flatten them if required.
Step 5 On-Site Tile Cutting
Measure and label tiles that need trimming for wall edges or fixtures. Use a tile cutter or wet saw to achieve clean, accurate cuts.
Step 6 Level & Alignment Inspection
Regularly check tile flatness with a level tool. Make any adjustments while the mortar is still workable.
Step 7 Mortar Curing Period
Leave the adhesive to fully harden for 24–48 hours, or follow the official product specifications, before starting grouting work.
Step 8 Grout Application
Take out all tile spacers first. Prepare grout mix, then use a grout float to push the material fully into tile gaps. Wipe away surplus grout from tile faces with a damp sponge.
Step 9 Final Cleaning & Sealing
Once the grout is completely dry, wipe off residual grout film from the tiles. If advised by the manufacturer, apply a protective sealer to guard the grout and extend service life.
PRODUCTION LINE AND FACILITY

CERTIFICATIONS
Our quartz are qualified with the certificate of ISO, SGS, CE.

Hot Tags: nero marquina wall tiles, China nero marquina wall tiles manufacturers, factory
No Information


